Hello to all you wonderful A Bird and A Bean readers! I’m so excited to be here to share this fun Christmas decorating idea with you! This is my first contributor post EVER and so I agonized over what I should make. I wanted it to be special and fun and something that everyone could easily do.
I actually got the inspiration for this project from pinterest, and, if you follow me on my blog you know that I LOVE pinterest!! I don’t use google for craft ideas anymore, I go straight to pinterest and I always find so many great ideas to inspire me.
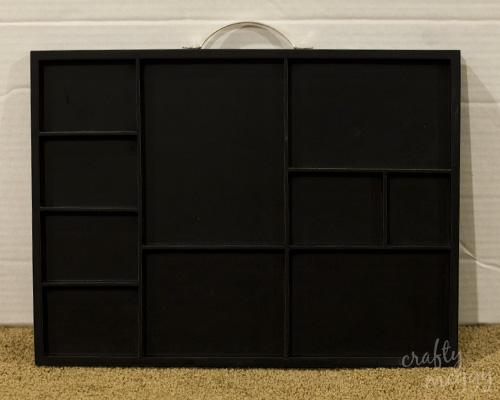
First off, I headed to Michael’s to buy a 7 Gypsies tray. I was so sad when I didn’t find the EXACT one that I found on pinterest, but I was glad to have found one. It was from Recollections and I actually think that I like it more than the 7 Gypsies tray, shhhh!! Don’t tell!
While I was in Michael’s they were having a Hot Buy sale on a bunch of Christmas paper pads so I grabbed a few of them. I fell in LOVE with this Festivus Recollections doodle paper pad and decided that’s what I was going to use for this project.
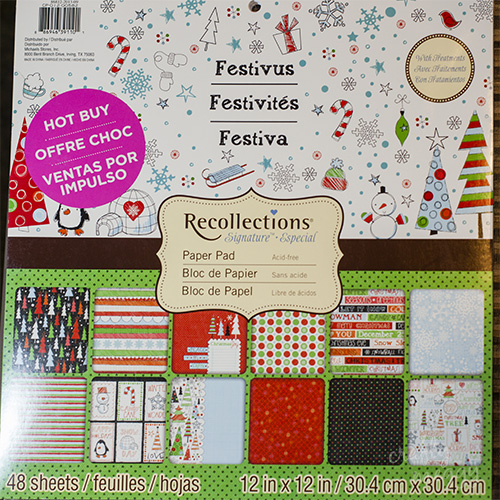
It’s cute, right?! Normally, $19.99 and I got it for $5! Yay!
Like I said before, it was REALLY easy to make my finished project! The cardboard box the tray come in gives you dimensions for each of the boxes of the tray to help with cutting papers. I picked out my papers and embellishments and got to work. This is what I ended up with:
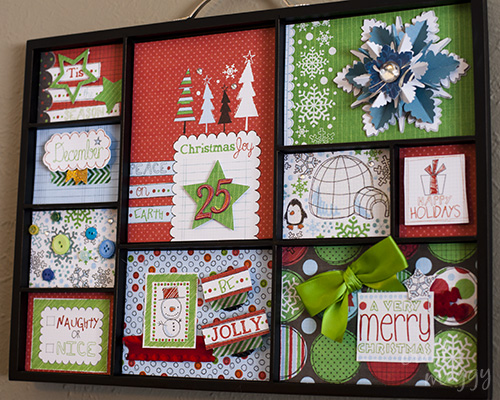
Have I told you how much I just LOVE how it turned out?!! This was the most fun I’ve had making a Christmas decoration this season! It’s by far my favorite project of the season! I had so much fun picking out the papers and embellishments.
Here are a few different angles and close ups for you to see better:
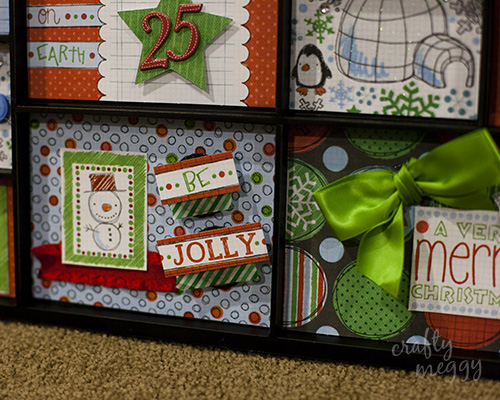
I loved using different embellishments to create dimension. I used bottle caps underneath the ‘Be Jolly’ phrase. To make the ‘Be Jolly’ stand out a little more and I put some washi tape underneath it.
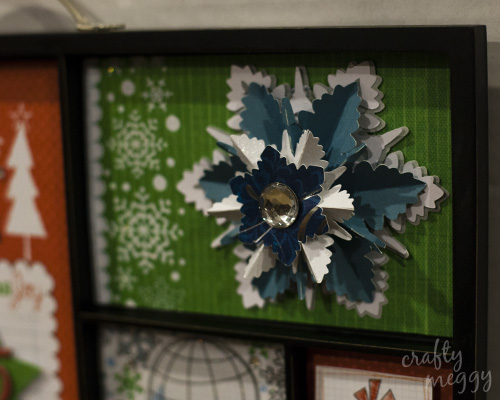
I made a bunch of these snowflake ornaments for an exchange I was a part of, but this one was extra and I just love it so of course I had to make it a part of this decoration. I created it using my Silhouette Cameo and some shapes from the Silhouette Online Store. You can view the tutorial on how to make one yourself on my blog.
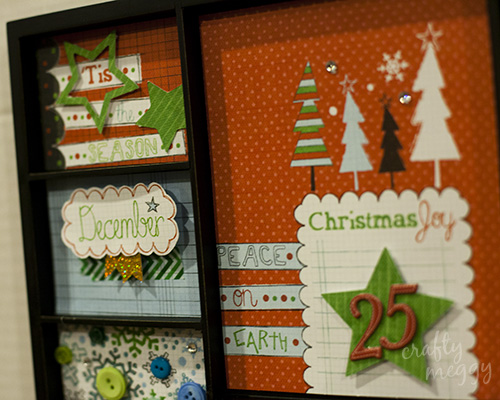
I cut the stars out with my Silhouette and used chipboard thickers from American Crafts for the ’25’.

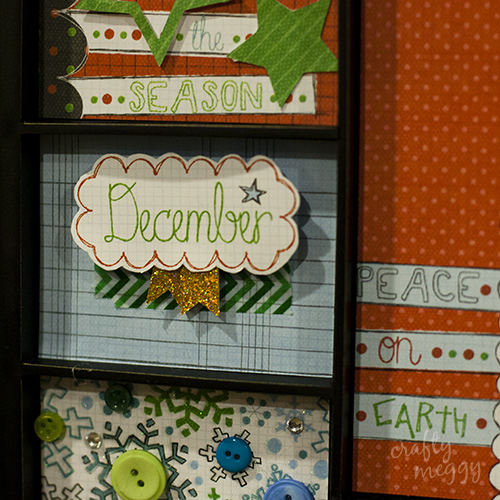
I think my favorite embellishment is the December tag with the gold glitter flags and the washi tape. I am starting to have a thing for tags, I don’t know why. And I also like the snowflakes with the buttons below it.
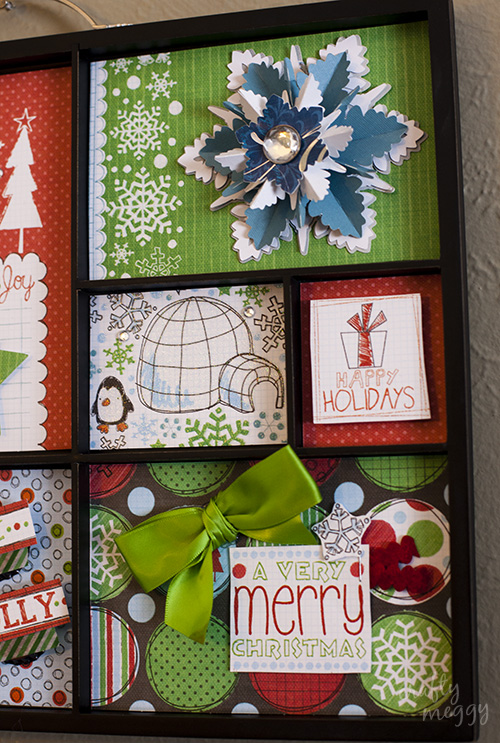
I also used foam dots to make some of the papers pop off the page, like in the ‘Happy Holidays’ tag above. The little snowflake also has a smaller foam dot so you can’t tell as much. I hot glued on the ribbon and stapled some red ribbon to the side of the ‘Merry Christmas’ tag.
If you want to make one, you don’t have to make it like mine at all! You could make it more simple or more embellished. Whatever your style is, just have fun doing it! I know I did and I’m actually kinda sad that I’m done with it. LOL Is that silly? I’m really considering making one for family and friends as Christmas/future birthday gifts. You could make one for each holiday of the year if you like! (Hey, that’s a good idea, I might do that…)
Thanks for stopping by today! I’m so glad to be a contributor for Erin and get to know you all better! I’ll be back next month with another fun craft! Have a great weekend!
Megan’s a full-time mom and a part-time professional photographer. When she’s not busy cleaning up after 3 wild and crazy boys and hubby, she can be found holed up in her craft room making things. She loves to sew, scrapbook, make cards and create. She blogs over at Crafty Meggy expressing her creative side in a house full of boys. She posts all about her crafting, organizing and cleaning adventures.
Connect with Megan. You’ll be so glad you did!
Crafty Meggy Blog | Facebook | Twitter | Pinterest |