How to make Winter Displays in Summer Containers.
What do you do with your summer plant container gardens in the fall?
Do you just let them become an ignored and unsightly reminder of more glorious gardening days? Maybe you just tear everything out and send it to the compost heap, then stow empty containers until spring.
You can re-purpose your containers for fall and winter and enjoy a full year of beauty.
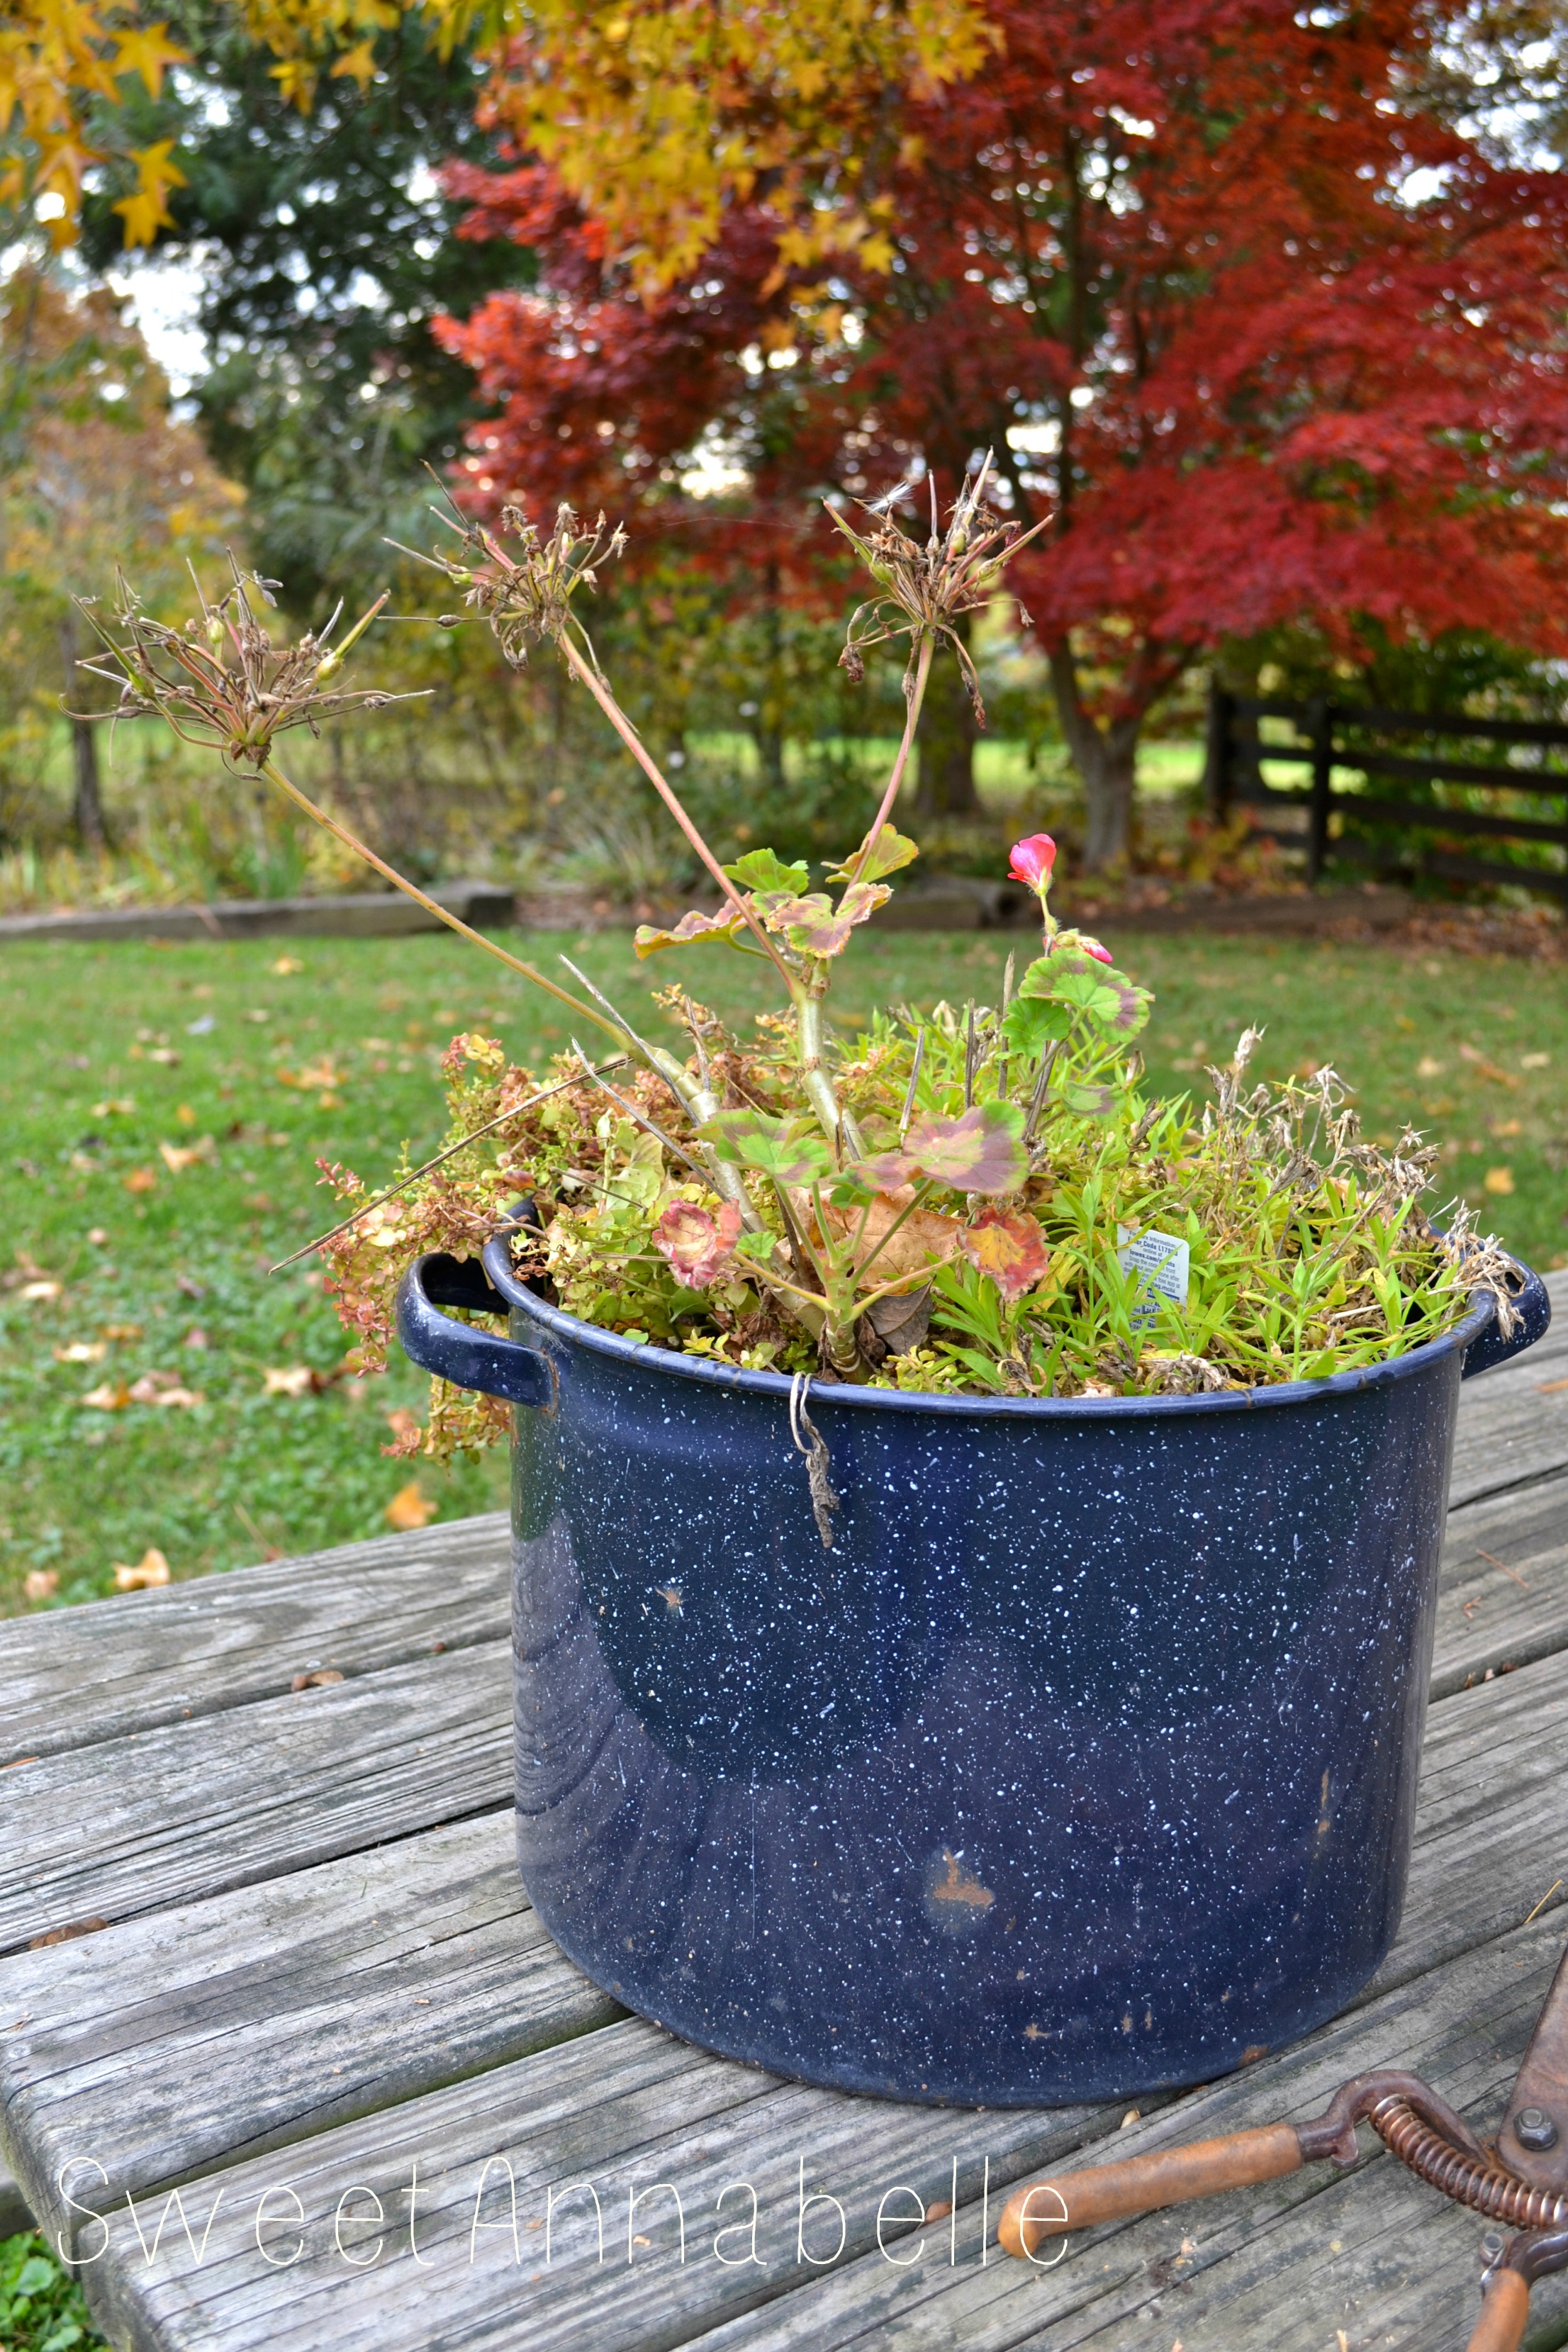
Using this summer planter as an example, I’ll try to show you how to do that. During the spring and summer months, this container had a mixture of annual and perennial plants. Some of them will return next spring, giving me a jumpstart with free and early plants in 2014 – IF I take care of them properly now.

To begin, trim all the plants down to no more than one inch of growth.
This container had a mix of geranium, dianthus and creeping jenny.
(I’ve removed the geranium entirely, but have plans to save it for next year too. Watch my blog for a short tutorial on overwintering geraniums soon!)
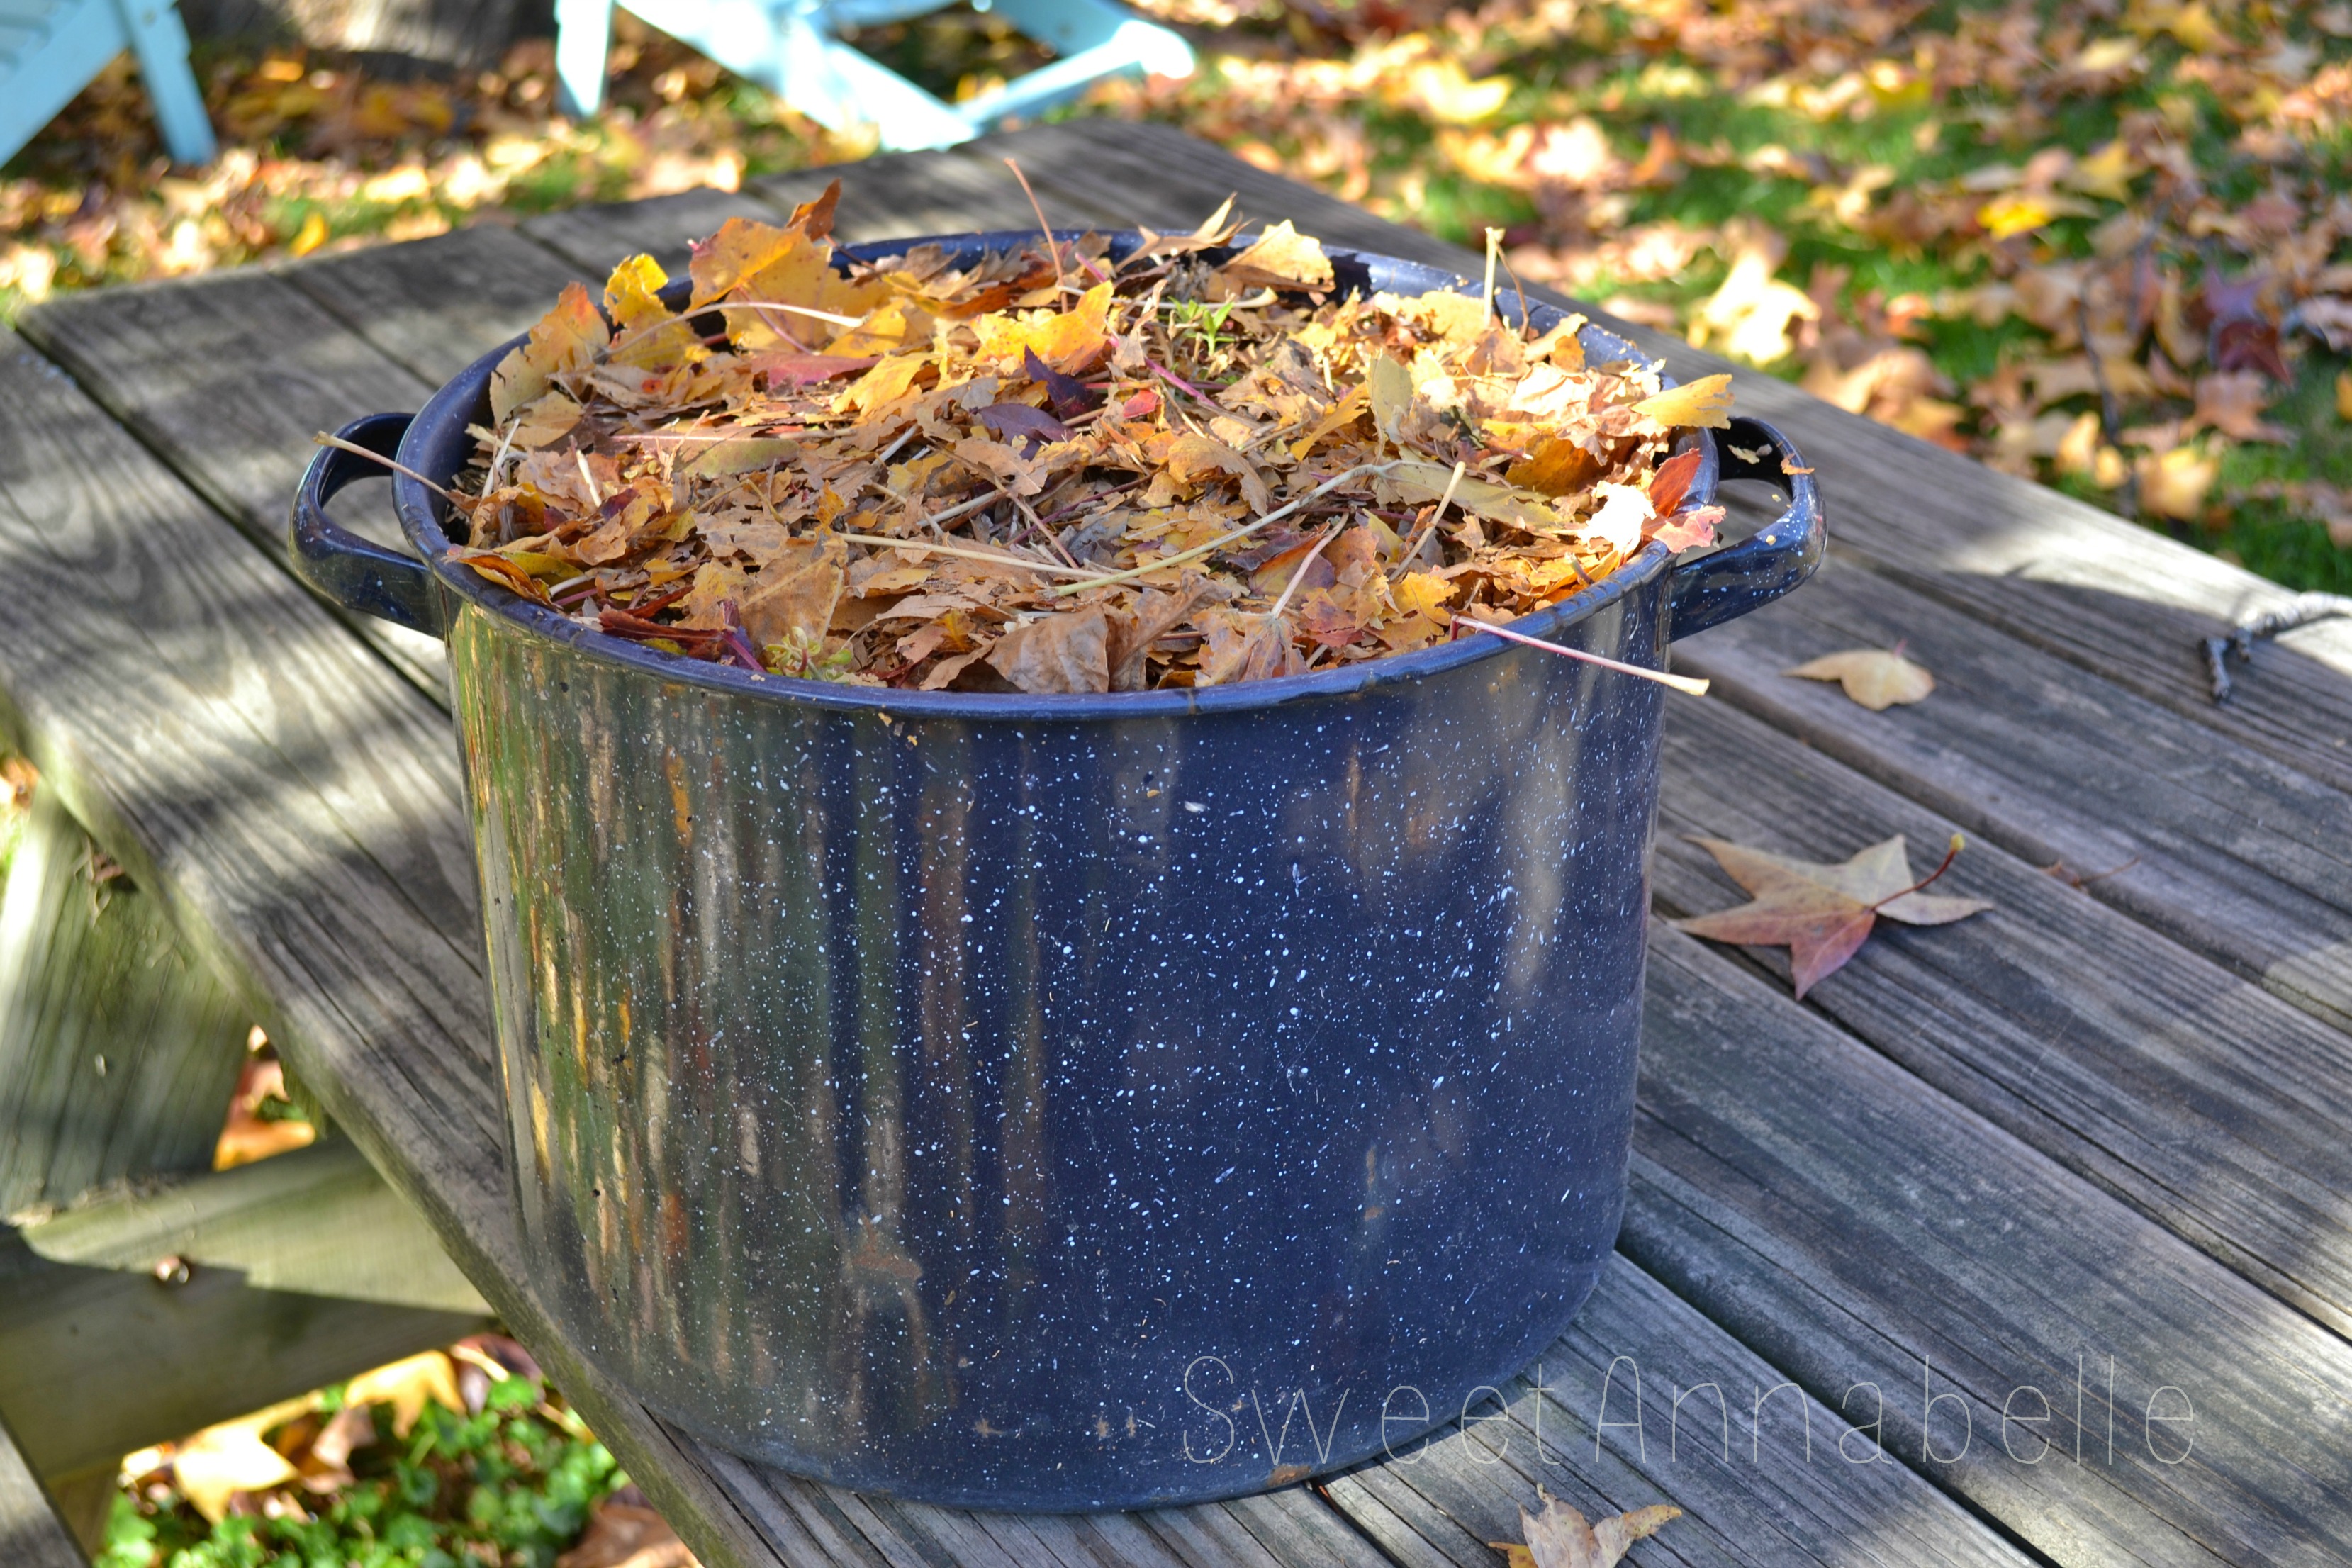
Cover the surface with about an inch of leaf mulch.
My husband makes a wonderful mulch from the leaves that have already fallen with his leaf blower/mulcher. I think I’ll keep him around! If you don’t have that lawn tool, mow over the piles of leaves in your yard and go back to scoop up the ready-made leaf mulch. Free – SCORE! Over the winter, the mulch layer will decompose, improving the soil in the container and protecting the plant roots, making it more likely that your plants will live through the winter and return in the spring.

Meander around your yard (and/or your neighbor’s yard) and collect plants for a winter arrangement.
I cut evergreen branches, a couple varieties of hydrangea, grass plumes, tall sedum and some berried branches from the fence row. Even if you only have two choices, you can make an arrangement that will look great all winter!
***Remember: ‘berries white, run in fright’. Do not add poison ivy berries to your arrangement!
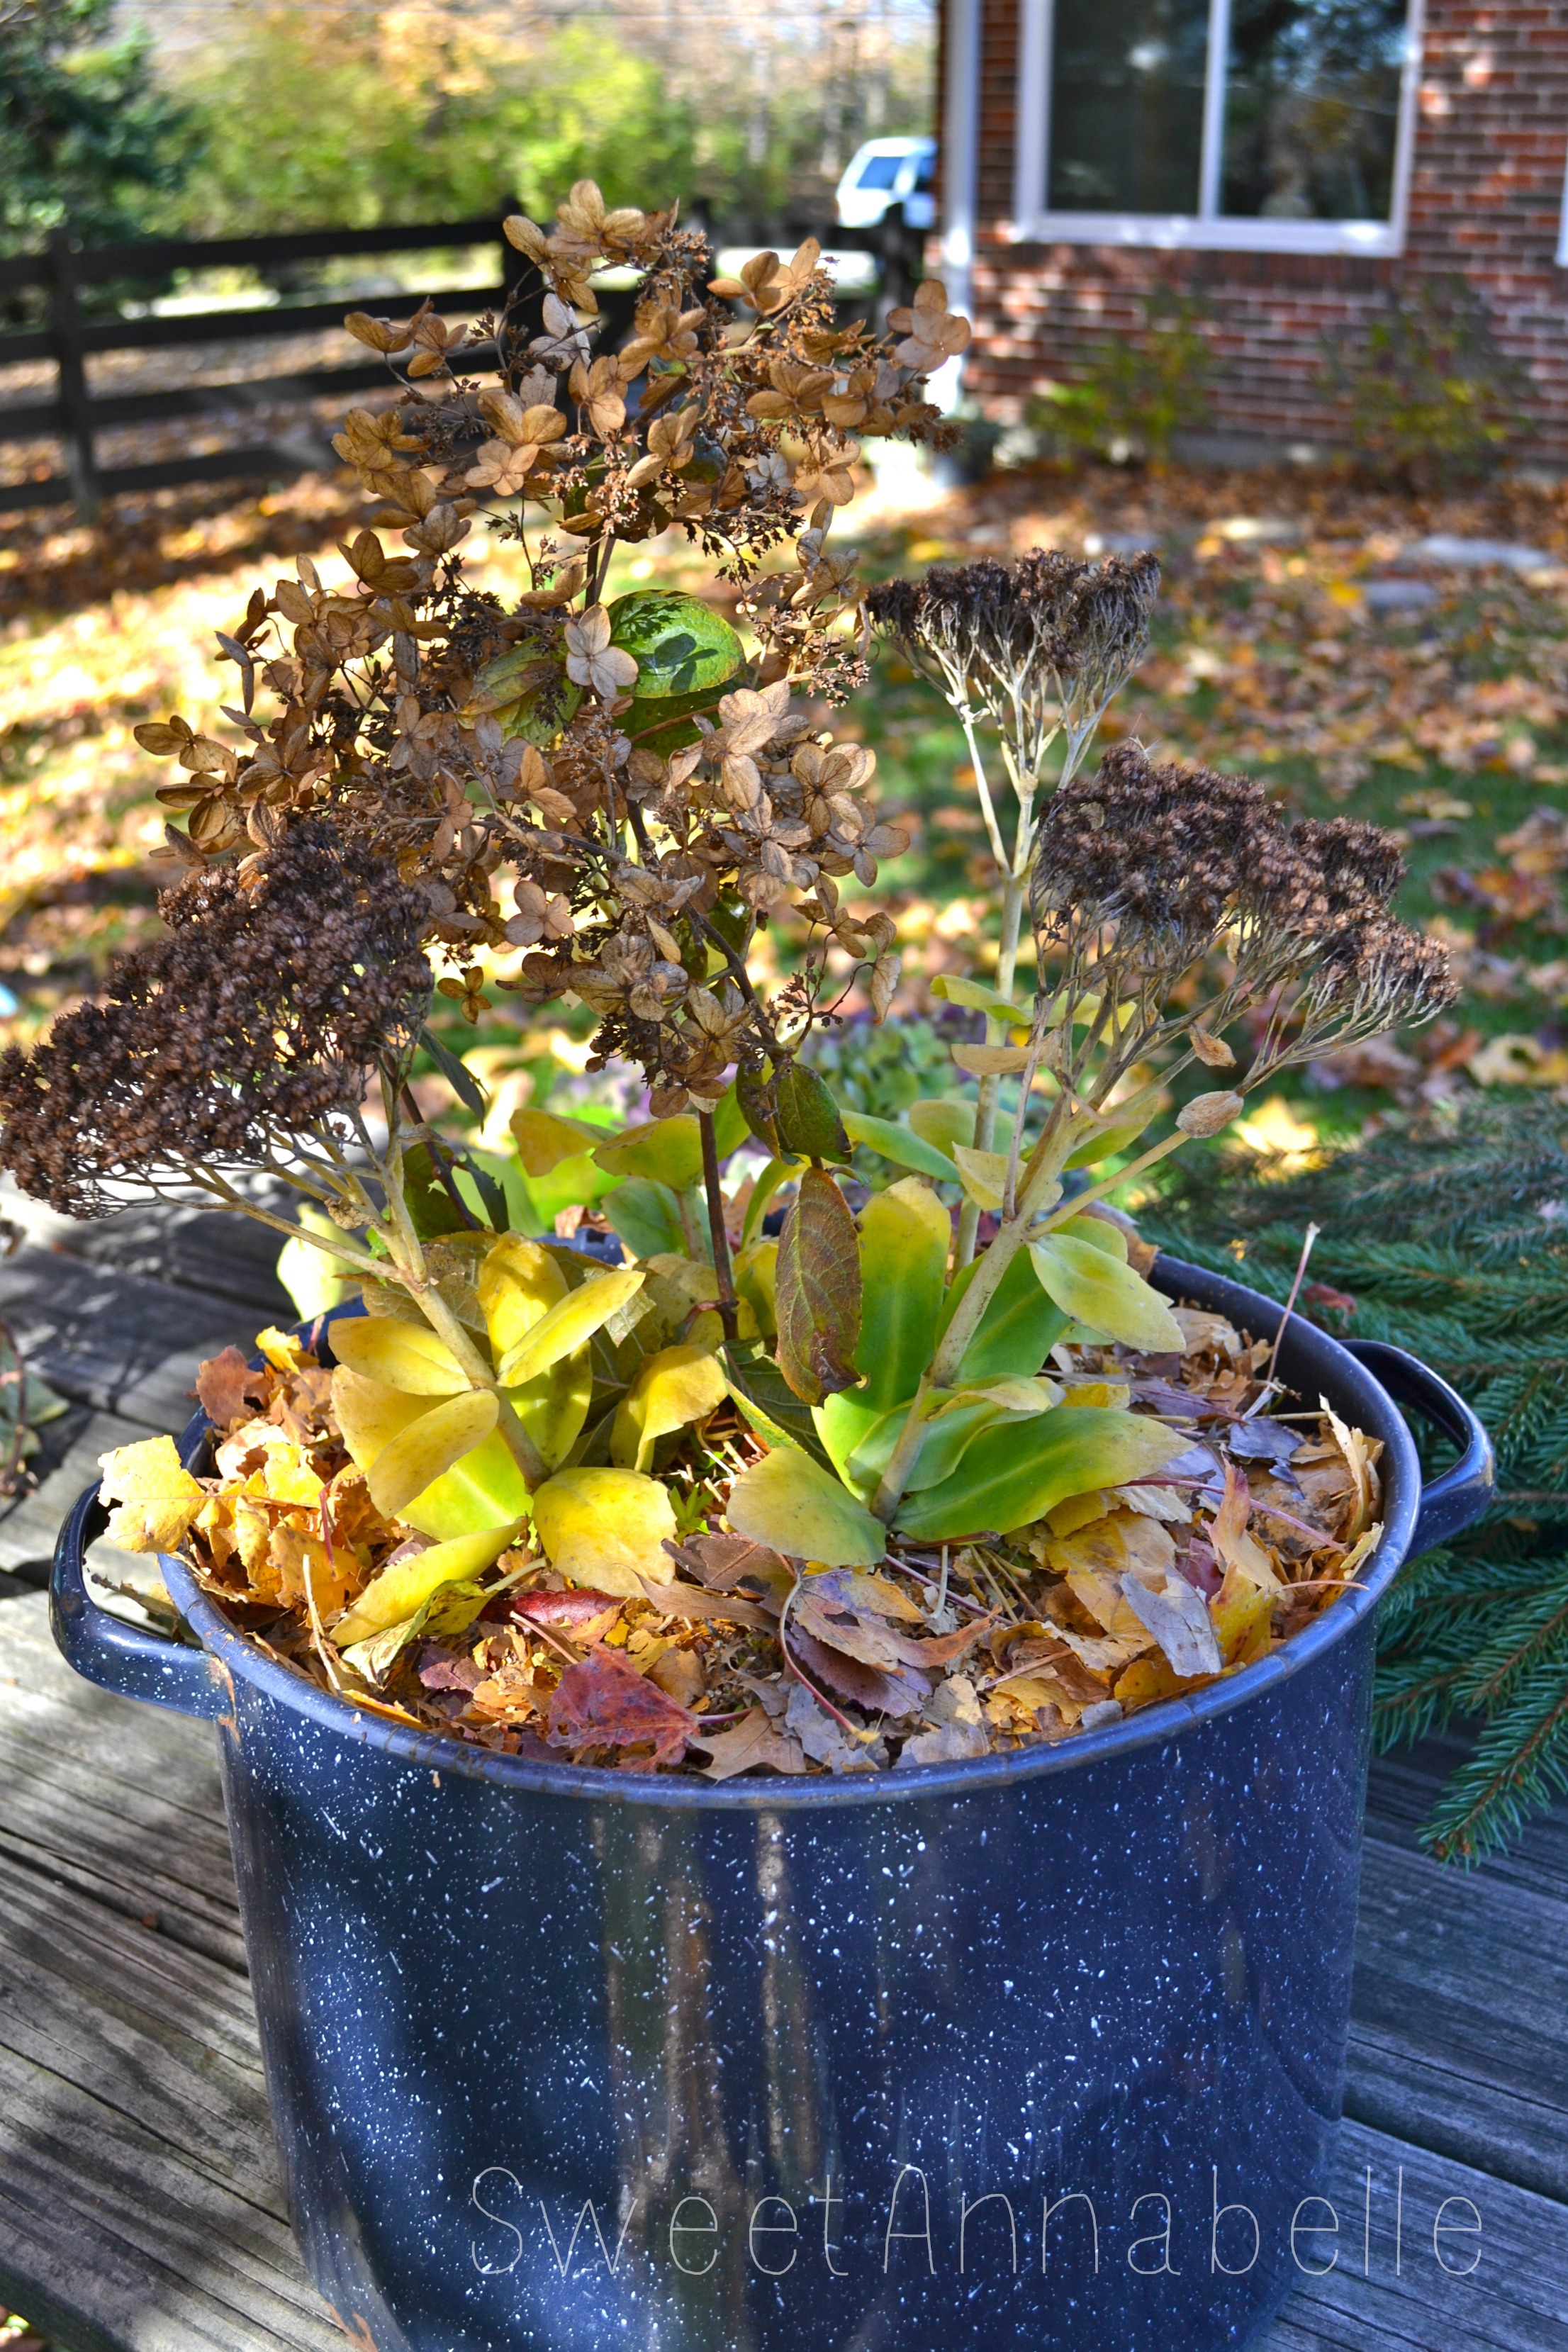
Start by arranging the tallest items in the center.
I’ve used pink diamond hydrangea stems and sedum. You could use the grass plumes in the center also, or the blue hydrangea heads. Just press the stems right through the leaf layer and into the soil. If you encounter bundles of roots, just move a little to the right or left. Avoid pressing stems directly into root bundles to give those summer plants the best chance to return in the spring.
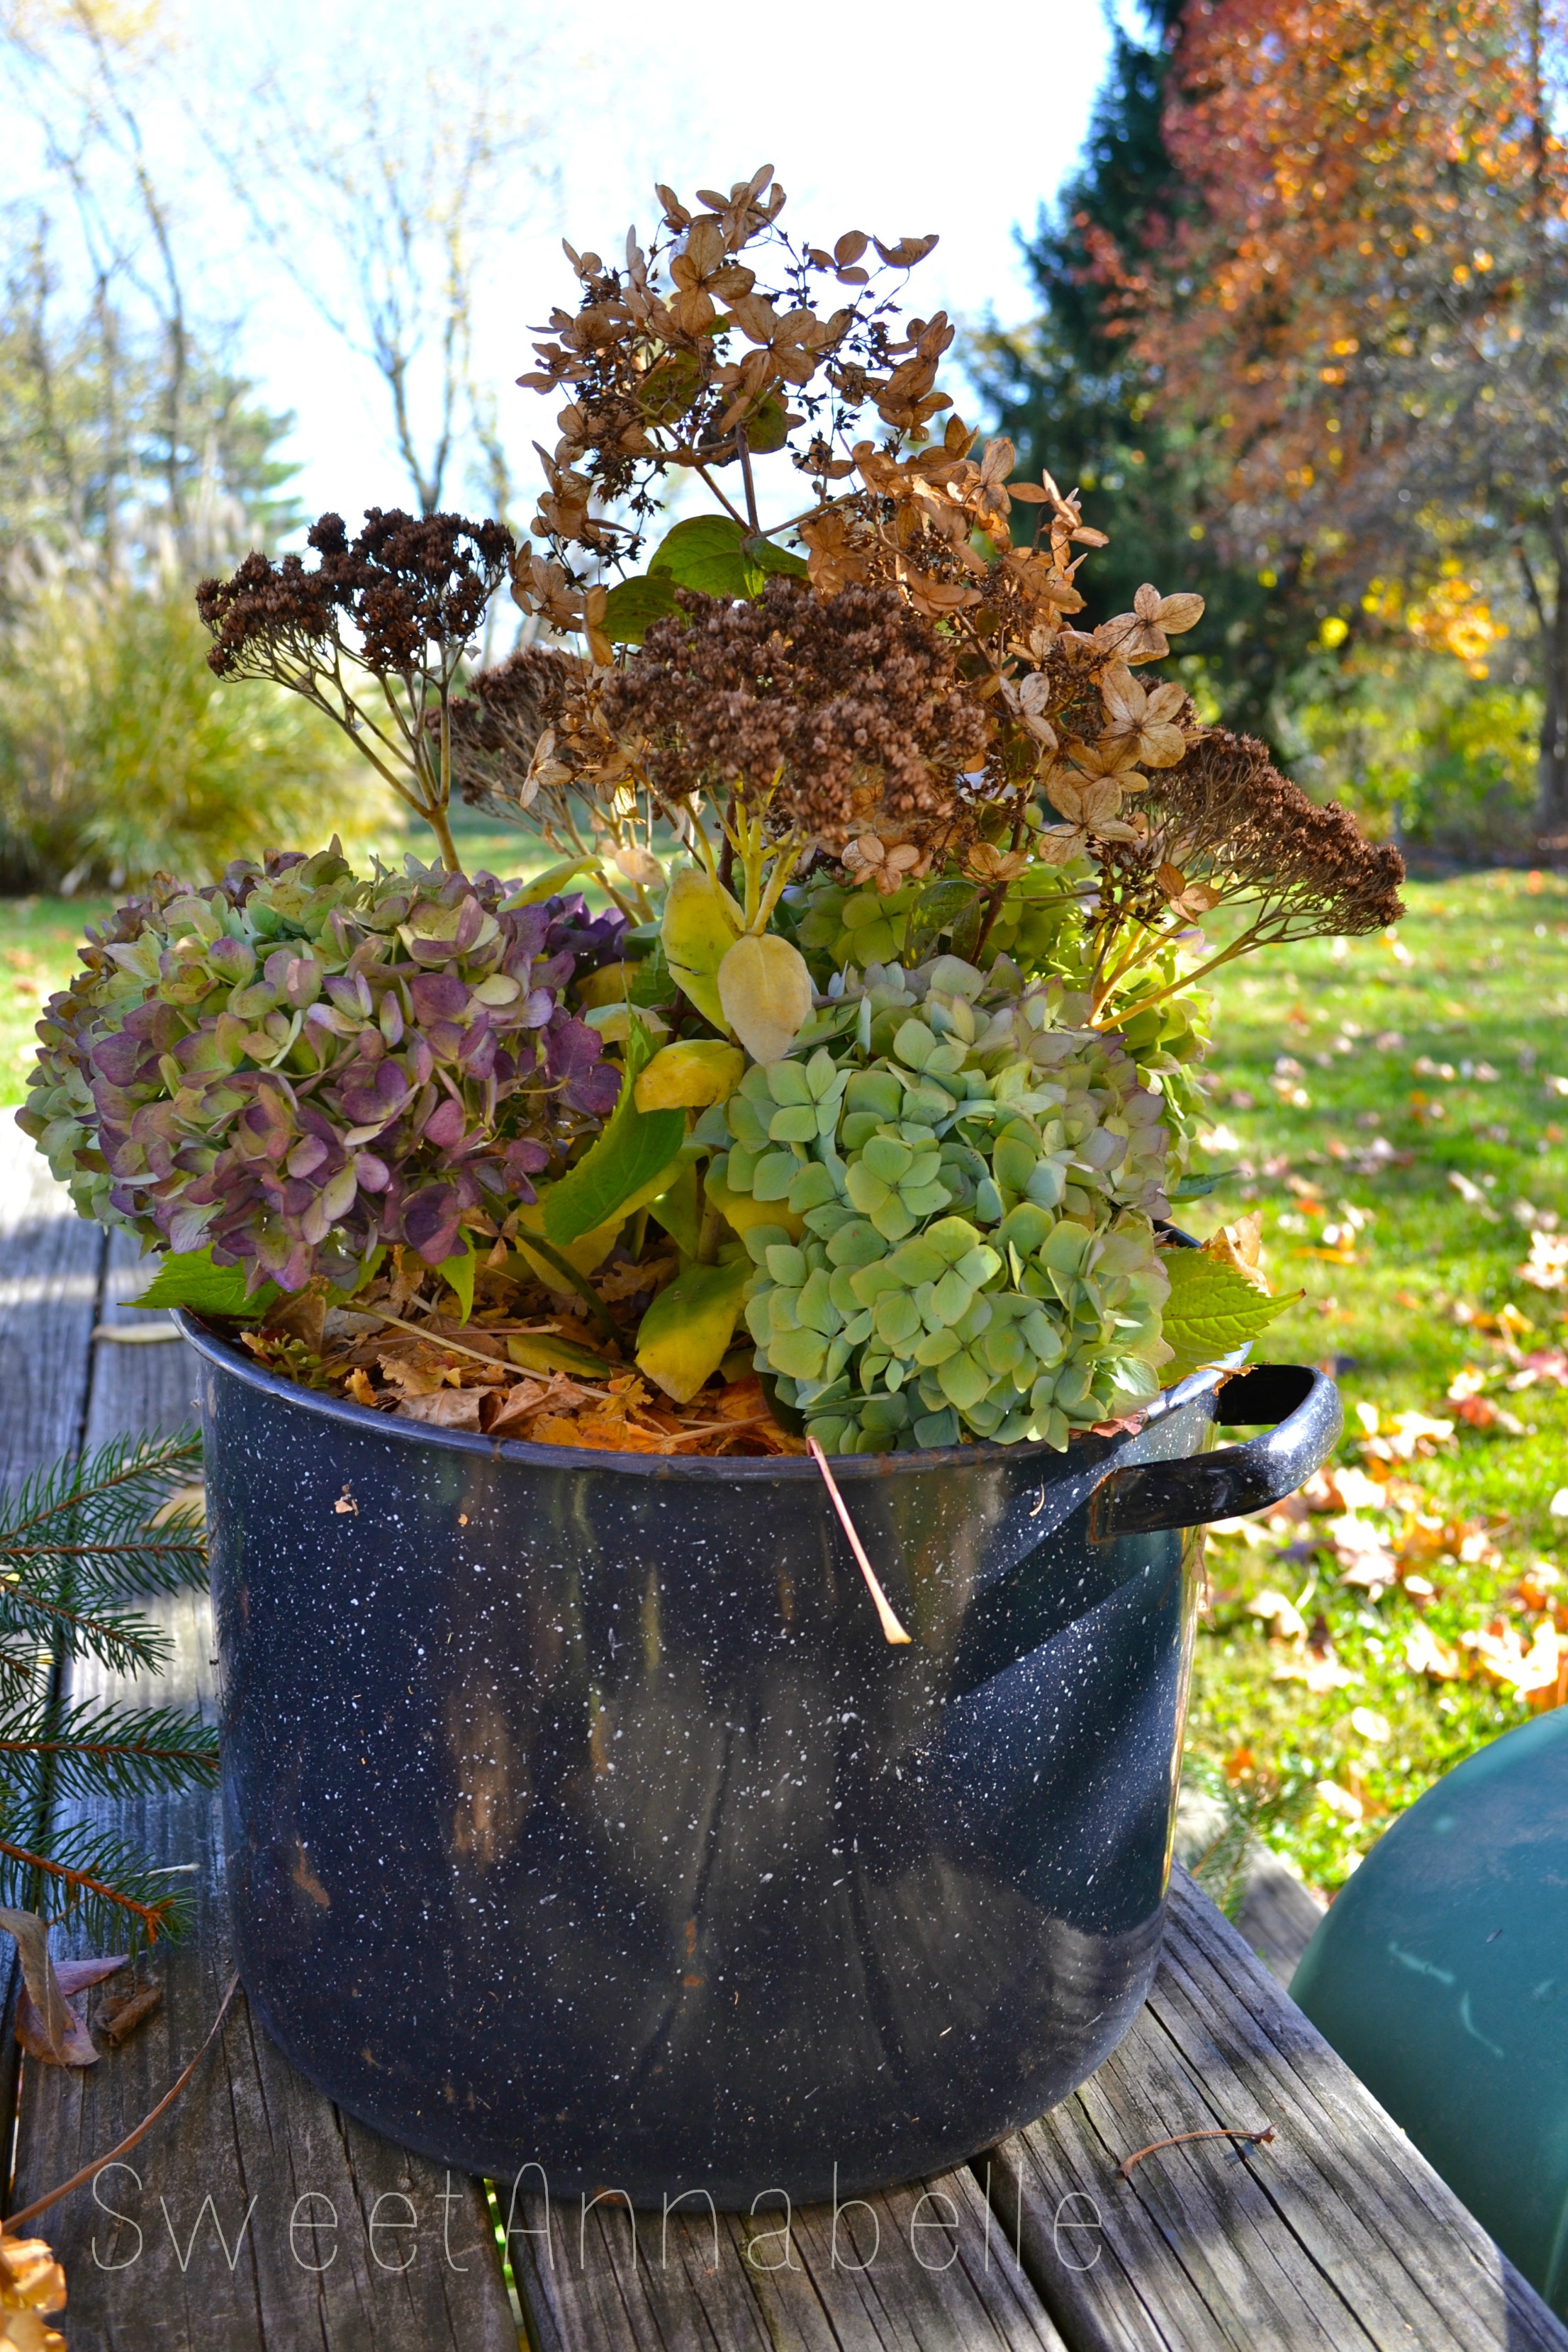
Now add the mid-level stems.
Use something that will cover up the exposed stems of the talls. I’ve used hydrangea mop-heads that still have a little color. The color will fade when winter finally sets in, and they’ll become a parchment brown shade. If you don’t have hydrangea heads, you could move right to the evergreen trimmings and have two layers instead of three.
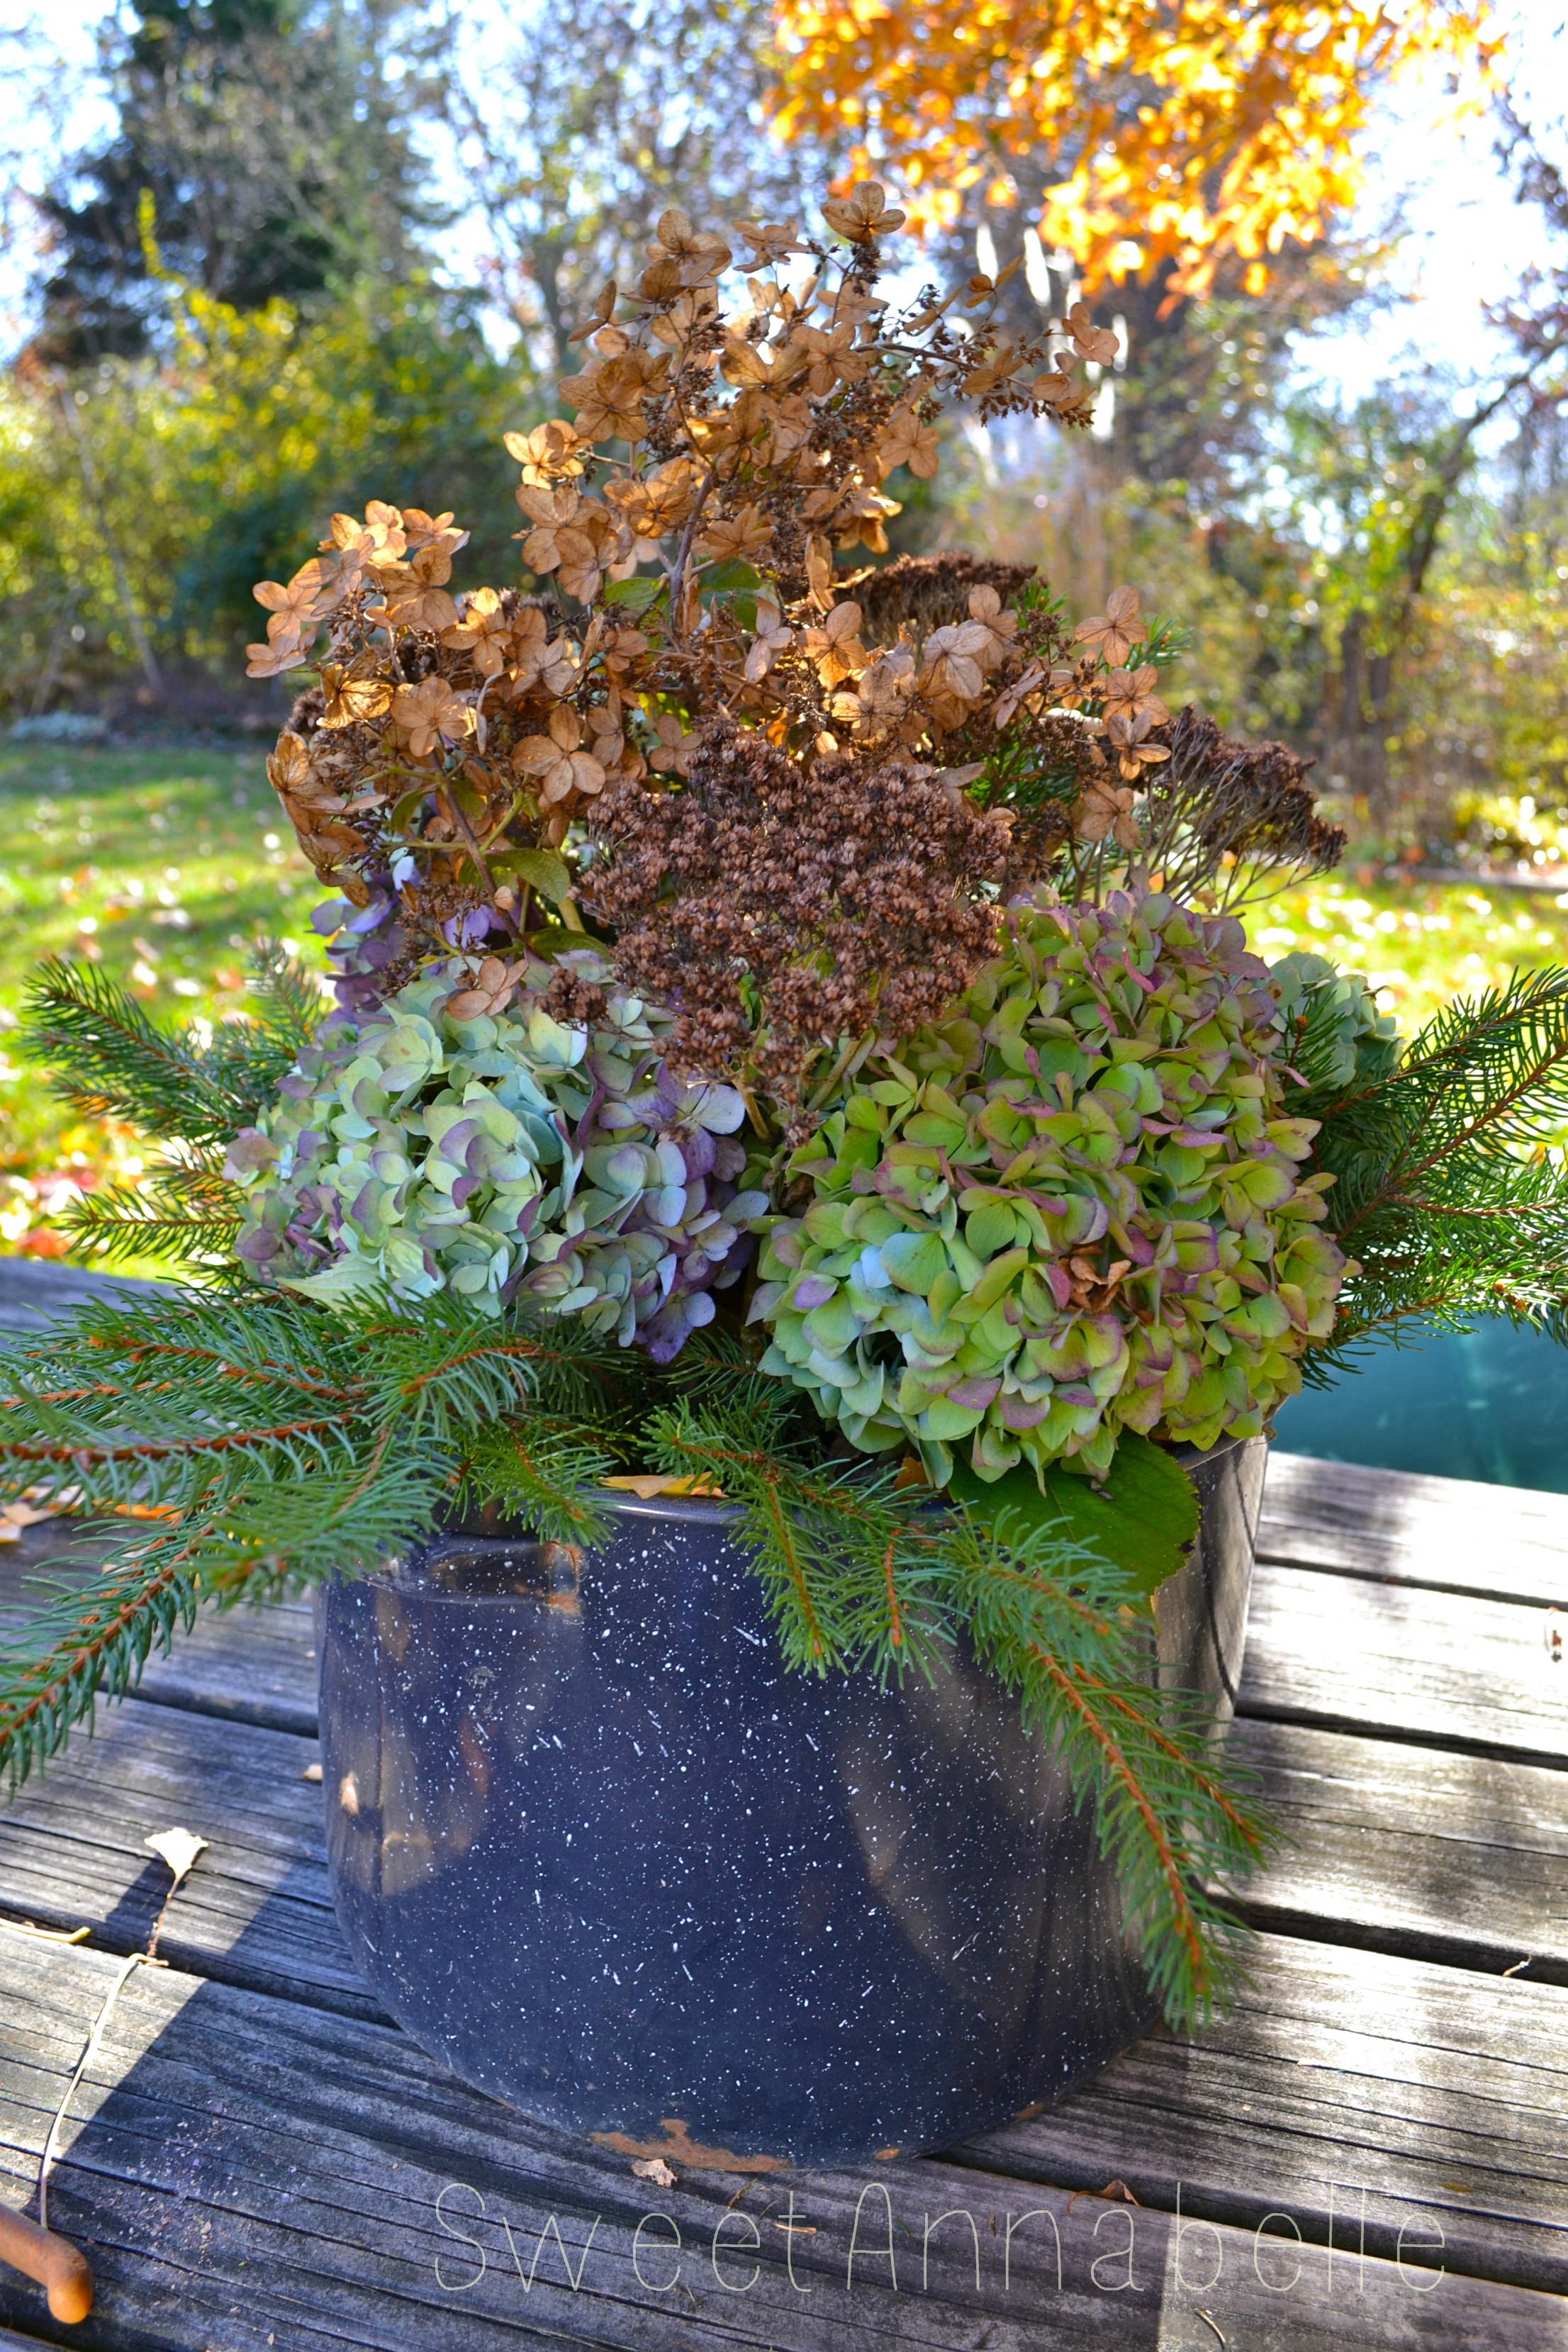
For the last layer, add the fir tree branches around the bottom of the arrangement, again just poking the stems into the leaf/soil base. If you have any bare spots, just go back and fill those in with any left over branches or stems. Make sure it’s nice and full for a sumptuous looking winter arrangement.
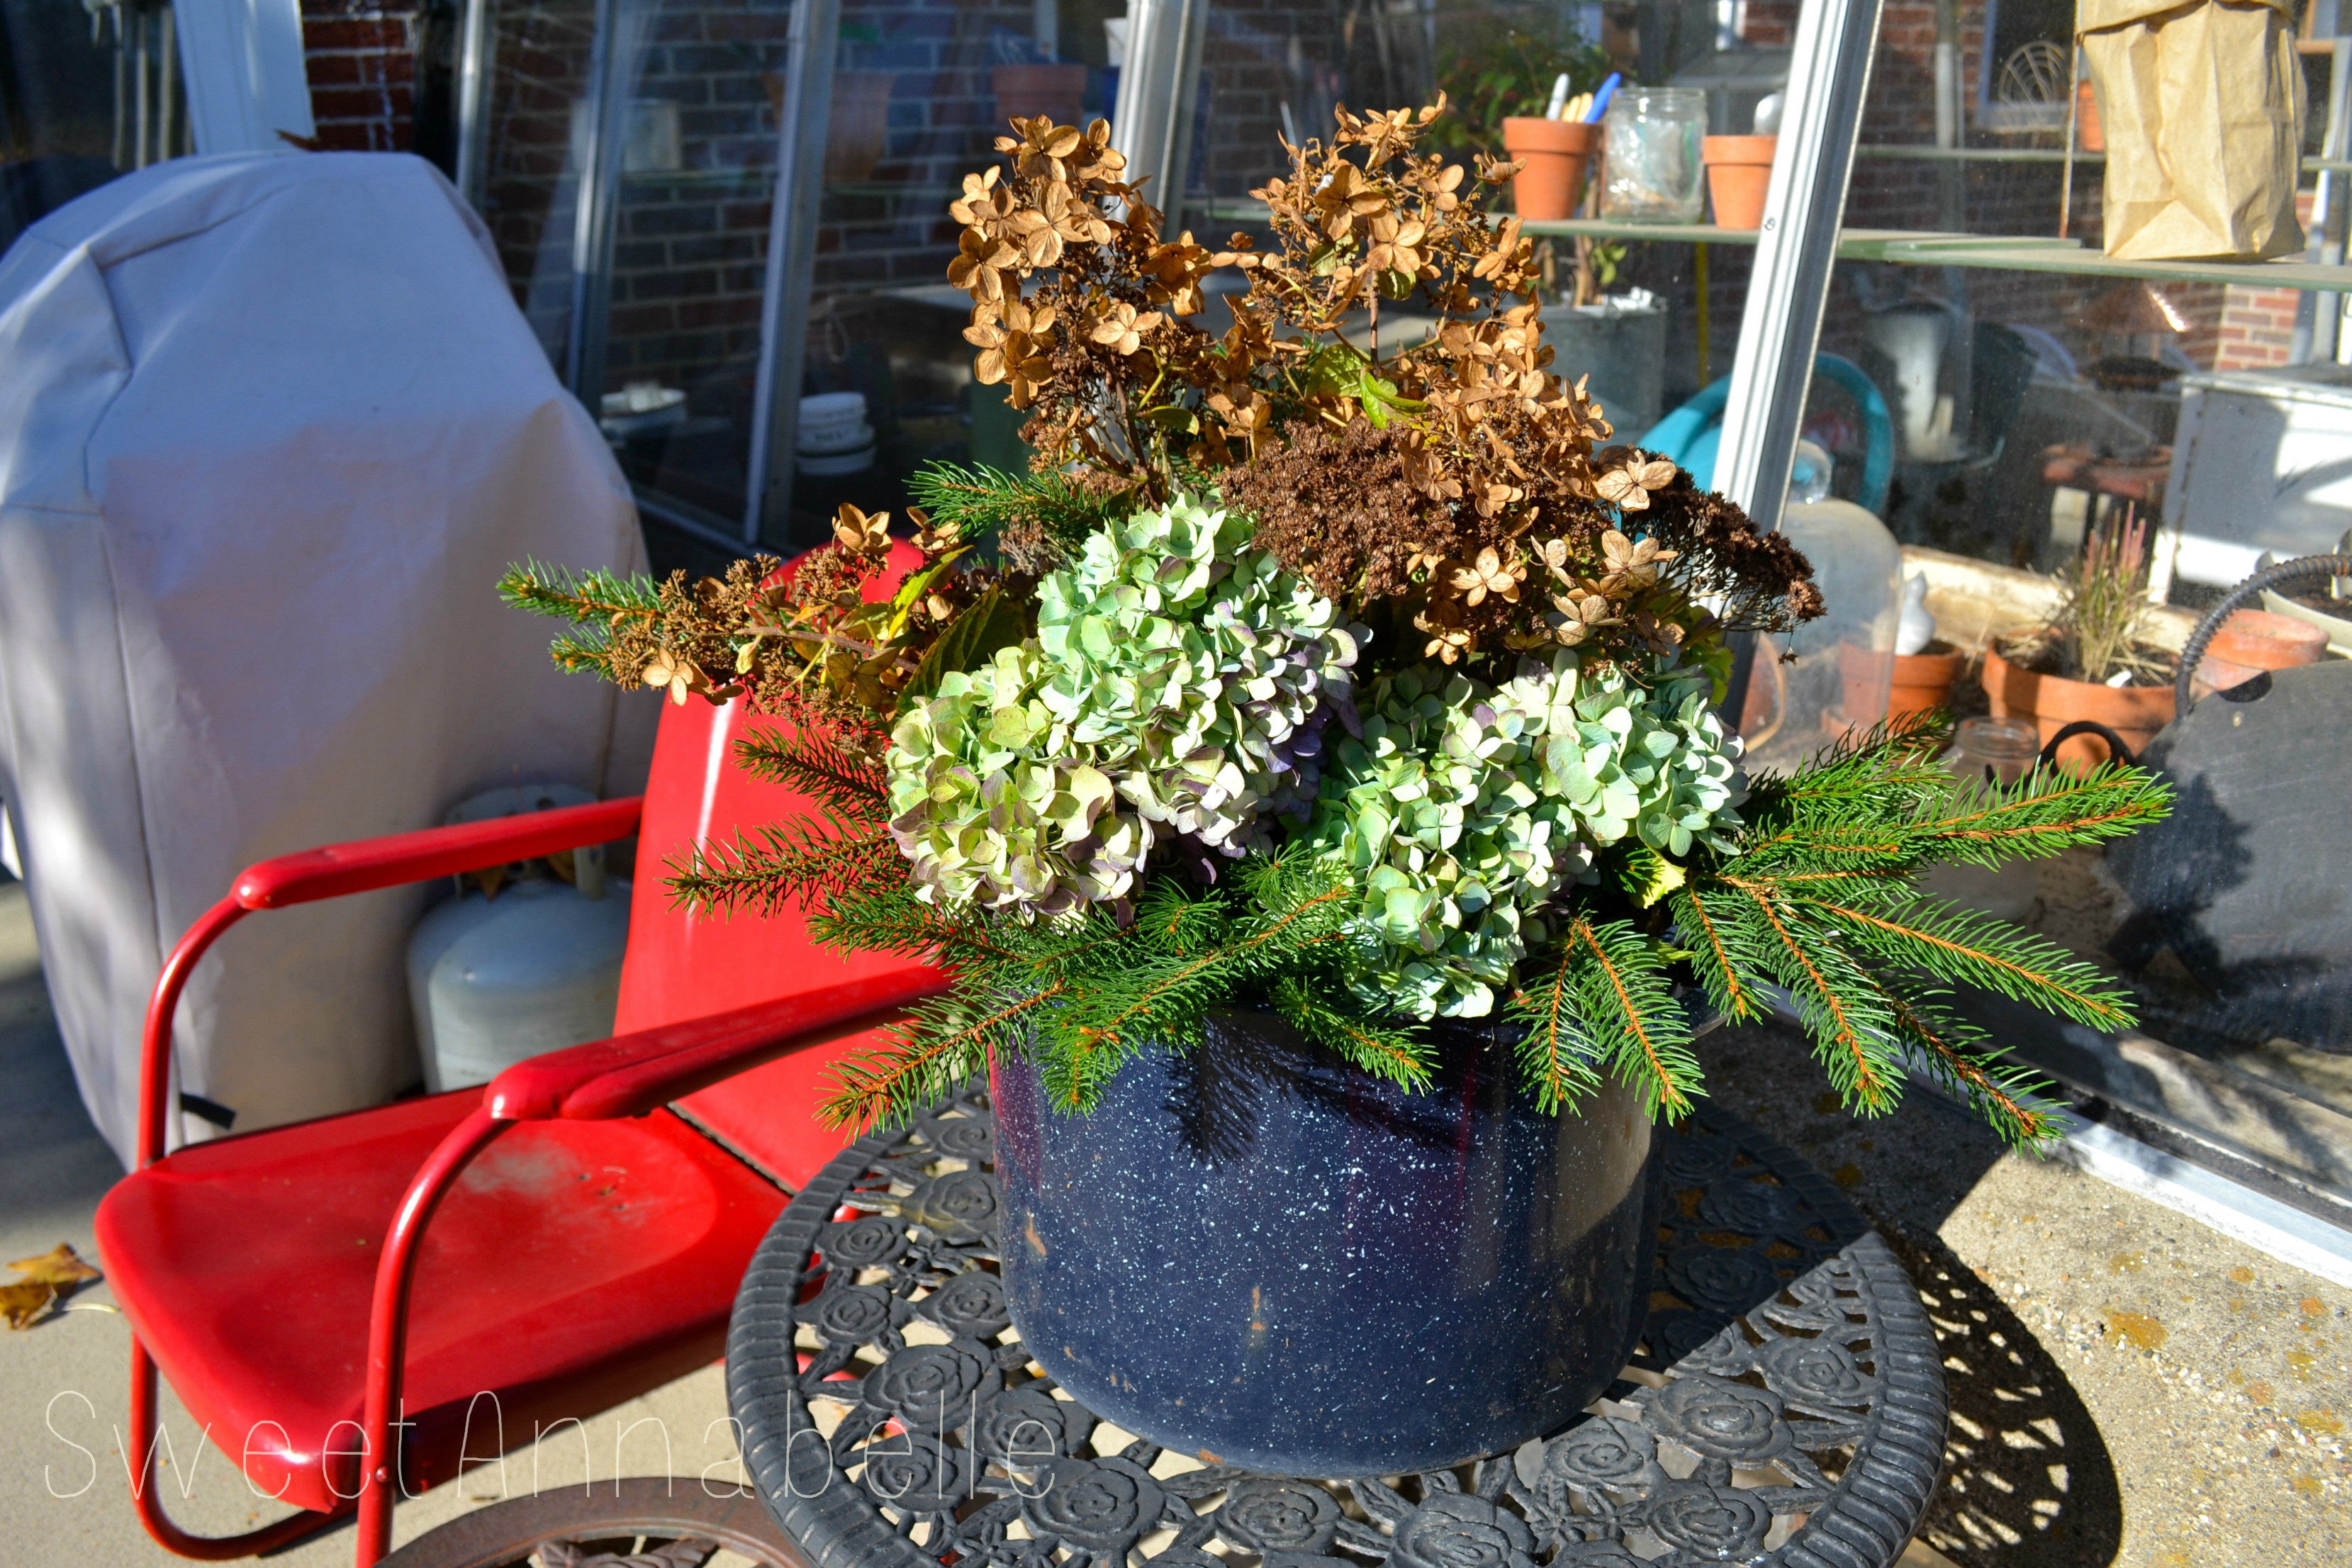
ENJOY!
Your arrangement should stay lovely for most of the winter. If it’s in the direct path of strong wind, or ice and snow, then it will start looking pretty tired by February. When spring does finally arrive, just whip those winter display stems out and throw them away.
Keep an eye out though, for plant stems that may have rooted over the winter – you might get free hydrangea or sedum plants out of this deal!
Don’t remove the protective leaf mulch layer until danger of frost is past. Hopefully, your plants from last year will be coming to life and showing new growth!
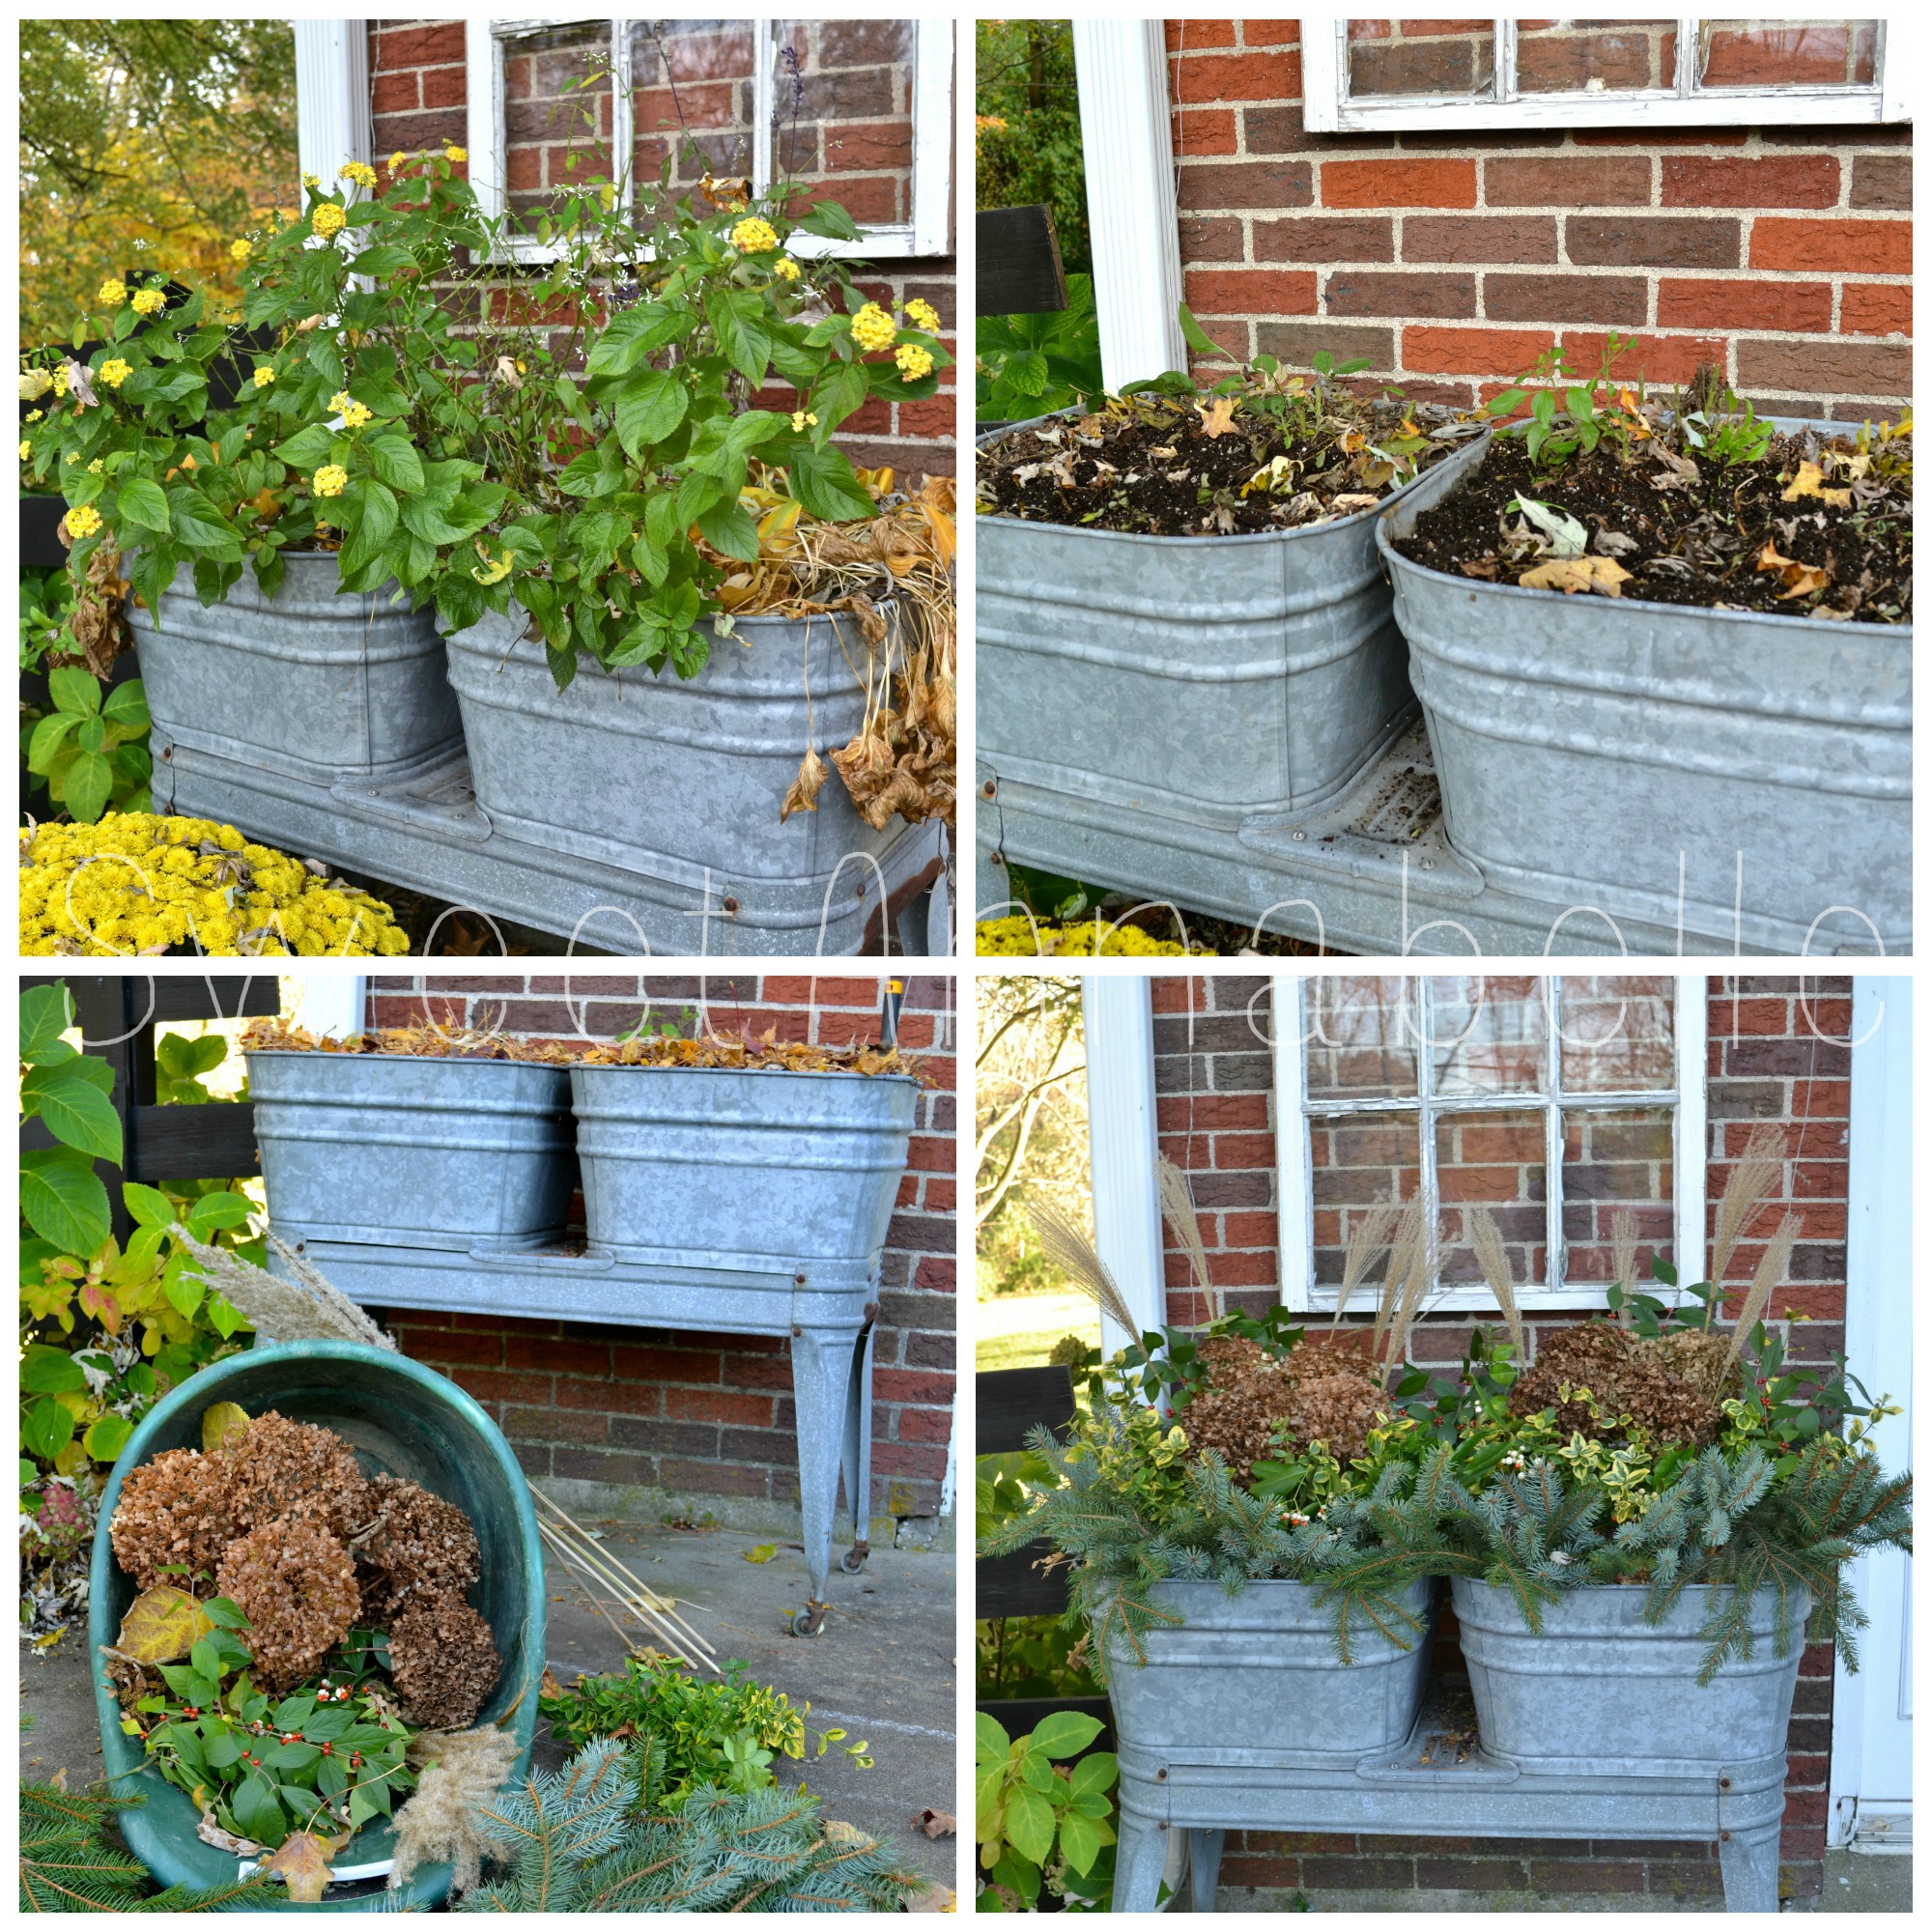
Lastly, here’s a photo of my washtub containers at the front door ‘before’ and ‘after’ the same process. I think they make a nice greeting for our guests during the holidays!
Please let me know how your project turns out – I’d love to see your BEFORE and AFTER photos!
May God bless you as we begin the Holiday season,
Susan
Susan is a forty-something, at-home mom, wife, daughter, sister, aunt, niece, teacher, friend – out here in the wide world trying to walk out a joyful life following the Lord Jesus Christ. She is the mom of all boys, parenting teens and navigating her way through the middle years with her husband. She documents the grand adventures of their lives at her blog Sweet Annabelle. She has a passion for gardening and hopes to share some of her successes, failures, tips, tricks and tutorials with us! She also has a rocking cool Etsy shop where she sells all kinds of vintage treasures.
Check out Susan’s other posts.
Connect with Susan. You’ll be glad you did!
Sweet-Annabelle Esty Shop | Sweet-Annabelle Blog | Pinterest | Facebook |