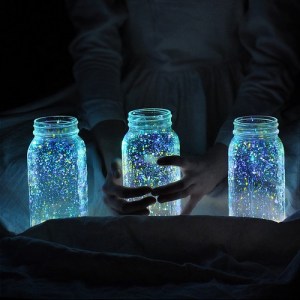
I first saw this idea on Pinterest a few weeks ago. LOVED IT! But, it was just a bunch of dead ends. No tutorial. No blog. No crafty mama telling me what to do next. Nothing. But I just LOVED the picture so much and decided to give it a whirl anyway. Sans tute. And ours turned out great!
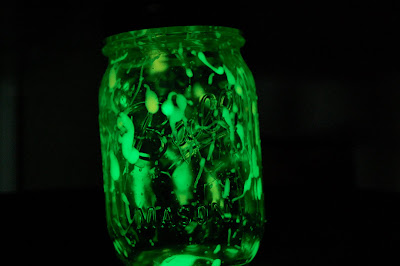
I searched out the glow paint at Hobby Lobby and picked up a few colors. FYI – You can’t really tell the colors apart when they are glowing. They all look green in the dark. I just bought glow-in-the-dark fabric paint, but there are other kinds too. Fabric paint happened to be 50 percent off that day – so ya know. 🙂
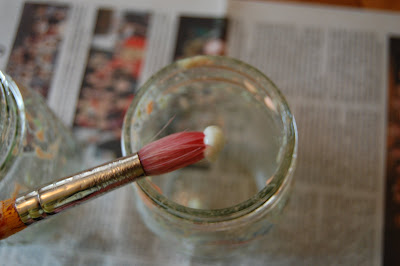
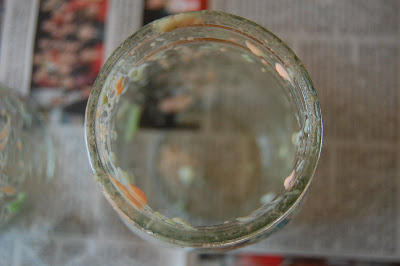
Then, I broke out some mason jars. I used a paint brush to splatter.
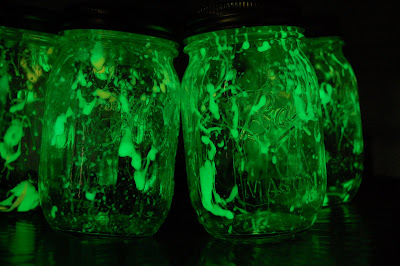
I still wish I knew how the original person made the splatters so small. I tried a toothbrush and it didn’t work AT ALL. Maybe their paint was much thinner? I also wish I knew where they got blue paint. I looked everywhere for blue and couldn’t find any.
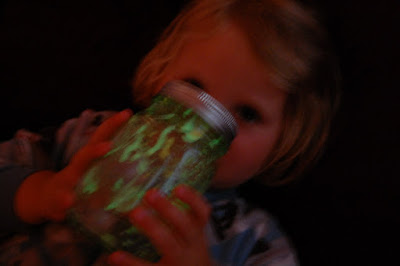
Oh well. I’m happy with the way our star jars turned out. The kids use them as night lights in bed and they think they’re so cool. (They don’t even notice that their stars look more like an 80’s party than a solar system.)
So, that works for me. 🙂
STAR JARS
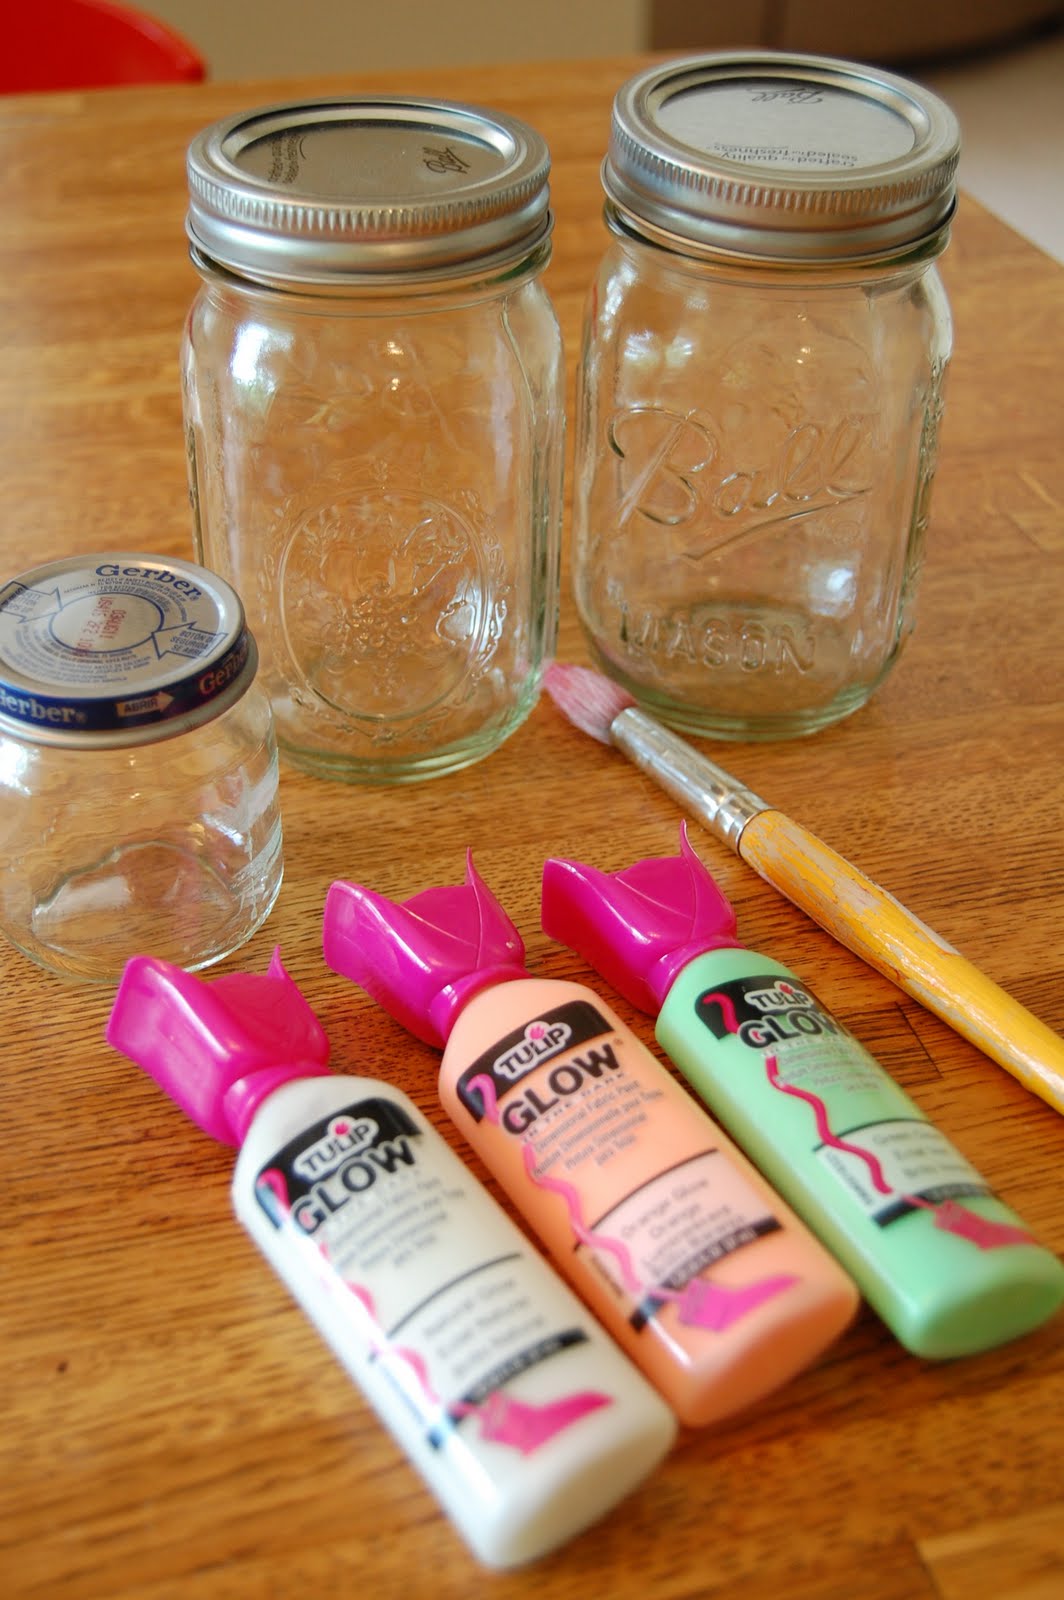
What you need:
a jar
glow in the dark paint (light activated … not black-light activated)
a paint brush

What you do:
Put some paint on the brush and smack it on the lip of the jar and watch it splatter in. It also splattered out on the table (and in my hair), so put some paper down and maybe find a hair net! 🙂
Let it dry completely before putting the lid on. I put the lid on one of them and it got all foggy and condensation formed inside. It disappeared when I opened it again. Strange.
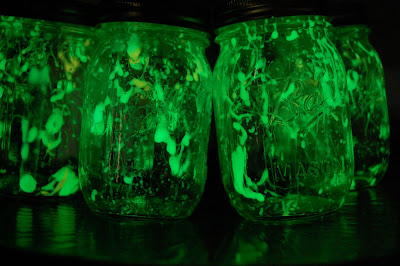
I also clearly need to find a tutorial on how to take pictures in the dark! Geez. But, you get the idea. 🙂


You know, it looks like the original was done more meticulously, like they individually applied the dots. Also, as a painter myself.. thinner paint will have a more “dot” like effect when splattered.. You might want to see if you can find a water based-glow in the dark acrylic paint, add water then splat.. or use a long-skinny bendable tool– like a skinny pipe cleaner or thick gauged wire and apply the “stars” as a collection of dots. The nature of paint is to run a little, so that might be why it appears to be splats? I don’t know, but it’s super cool! Both the original and yours! I am definitely trying this! Thanks for sharing.
How cute! Great tutorial too by the way. Would you link this up to my blog party Simply Creative over at 365 days to simplicity? Thanks.
Angela
http://365days2simplicity.blogspot.com/2011/07/simply-creative-blog-party-5.html
that is so cute! i love the speckled and star look.
AAAHHH love it!! I actually might have all the “ingredients” at my house…miracle…so maybe i can do this one!!
I have this pinned as well and was surprised that was no how to! 🙂 doesn’t everyone make how to’s??? 🙂 Glad you attempted it. I was thinking about getting the supplies together for a camping project. I love taking arts and crafts camping to do while we’re out there! My husband is a painter, I might ask him for tips on the smaller dots! If he has any I’ll let ya know. These are cool huh? I wanted to make a bunch and hang them in the trees around our campsite!
Maybe try splattering the paint with a straw by blowing. 🙂
I found a similar jar with dots. Here’s the link for the tutorial… http://frompankawithlove.wordpress.com/2012/01/08/glowing-jar-project-varazslat-a-lakasban-enhu/
Maybe splatter the paint using the toothbrush painting method?
Great idea!!